
Calligraphy is a beautiful and intricate art form that has been practiced for centuries.
It is the art of writing with a unique and expressive style, using specific tools like dip pens with pointed nibs or brush pens.
As a beginner, it might seem daunting at first, but with the right approach and practice, you can master this ancient skill and create stunning works of art.
There are various calligraphy styles, such as Copperplate, Spencerian, and modern calligraphy, which all share the foundation of basic strokes.
You’ll start by learning these foundational upstrokes and downstrokes to form letters and ultimately, words. As you become familiar with calligraphy techniques, you’ll develop a deeper understanding of the intricacies involved in creating balanced, harmonious compositions.
To help you on your journey, it’s essential to invest in quality calligraphy tools and supplies, such as the right pens, nibs, inks, and paper.
Additionally, consider taking courses or watching tutorial videos to accelerate your progress and learn from experienced calligraphers. Remember, patience and persistence are the keys to mastering any craft, including calligraphy.
This article contains affiliate links. If you make a purchase through a link on our site you are supporting our continued efforts to educate people like you in finding new and rewarding hobbies. Thank you!
Understanding Calligraphy
Calligraphy is the art of beautiful handwriting, which has been practiced for centuries by people all over the world.
It can be a relaxing and rewarding hobby, as well as a way to enhance your personal or professional projects. In this section, we’ll explore the history of calligraphy, different styles, and its importance in today’s world.
The History of Calligraphy
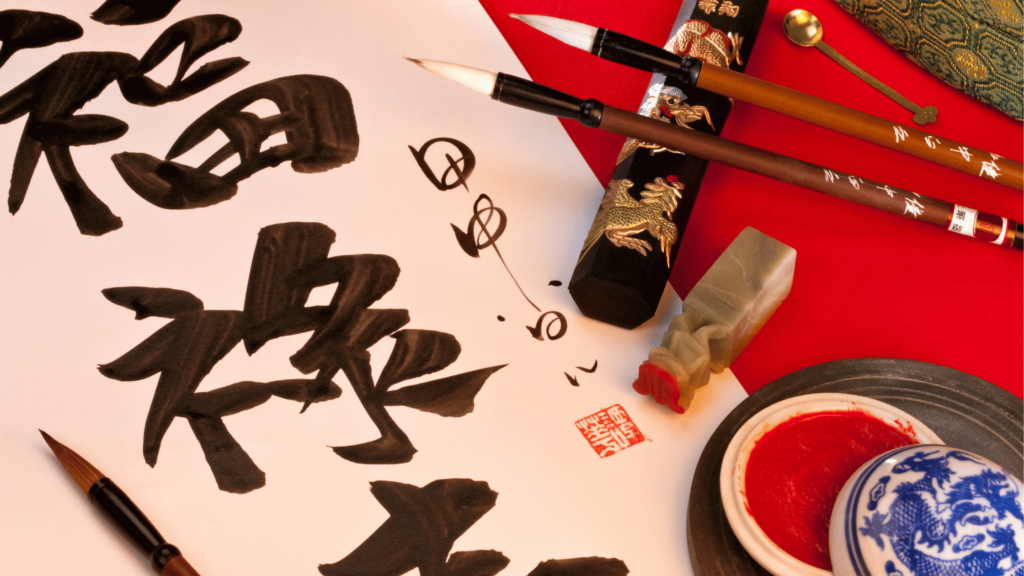
Calligraphy has its roots in many ancient civilizations, including Chinese, Arabic, Greek, and Roman cultures.
Each of these cultures developed their own unique styles and techniques, which have evolved and influenced the art of calligraphy over time. This rich history allows you to connect with the past while also creating something new and personal.
Different Styles of Calligraphy
There are various styles of calligraphy, each with their own unique characteristics and techniques. Some of the most popular styles include:
- Western Calligraphy: This style is often associated with elaborate and decorative lettering, such as Gothic, Copperplate, and Italic scripts.
- Chinese Calligraphy: Involves the use of a brush and ink, and is known for its flowing, expressive strokes.
- Arabic Calligraphy: Characterized by its flowing, interconnected letters, which are often used to create intricate designs and embellishments.
- Modern Calligraphy: A more relaxed and playful approach to the art, combining traditional techniques with contemporary design elements.
Each style requires different tools and skills, so take your time learning and experimenting to find the style that best suits your personal interests and abilities.
Importance of Calligraphy
Calligraphy remains relevant today, as it adds a personal touch and artistic flair to various forms of communication.
Whether you’re creating wedding invitations, designing logos, or simply enjoying the act of putting pen to paper, calligraphy offers endless possibilities for self-expression and creativity. Moreover, the art of calligraphy encourages mindfulness and relaxation, as it requires patience, focus, and dedication, making it a rewarding and fulfilling pursuit.
So, begin your calligraphy journey with understanding its fascinating history, exploring various styles, and appreciating its importance in today’s world. This foundation will help you build and refine your calligraphy skills and embark on a journey towards beautiful, unique handwriting.
Basic Calligraphy Tools

Choosing the Right Pen
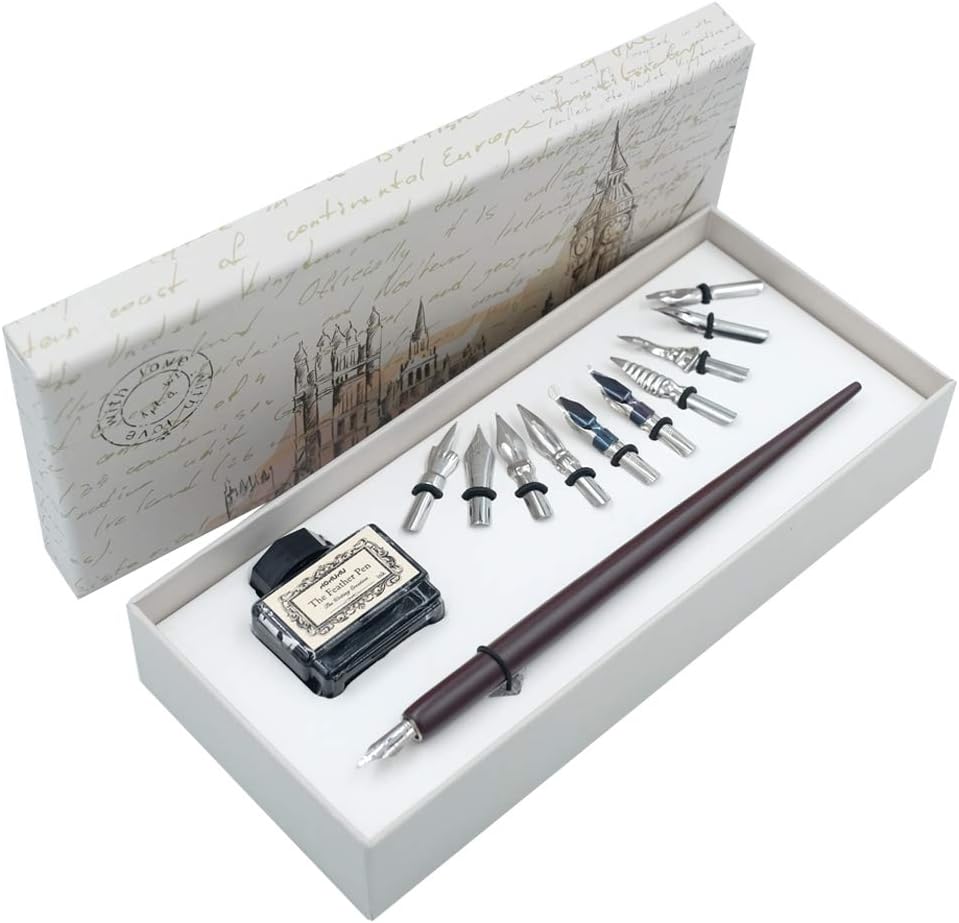
Selecting the right pen is essential for mastering the art of calligraphy. As a beginner, you can start with dip pens or brush pens.
Dip pens have a nib that you dip into ink, while brush pens have bristles that hold ink. Both provide exceptional control, but dip pens offer a more authentic experience, while brush pens are easier to handle for beginners.
Exploring Different Inks
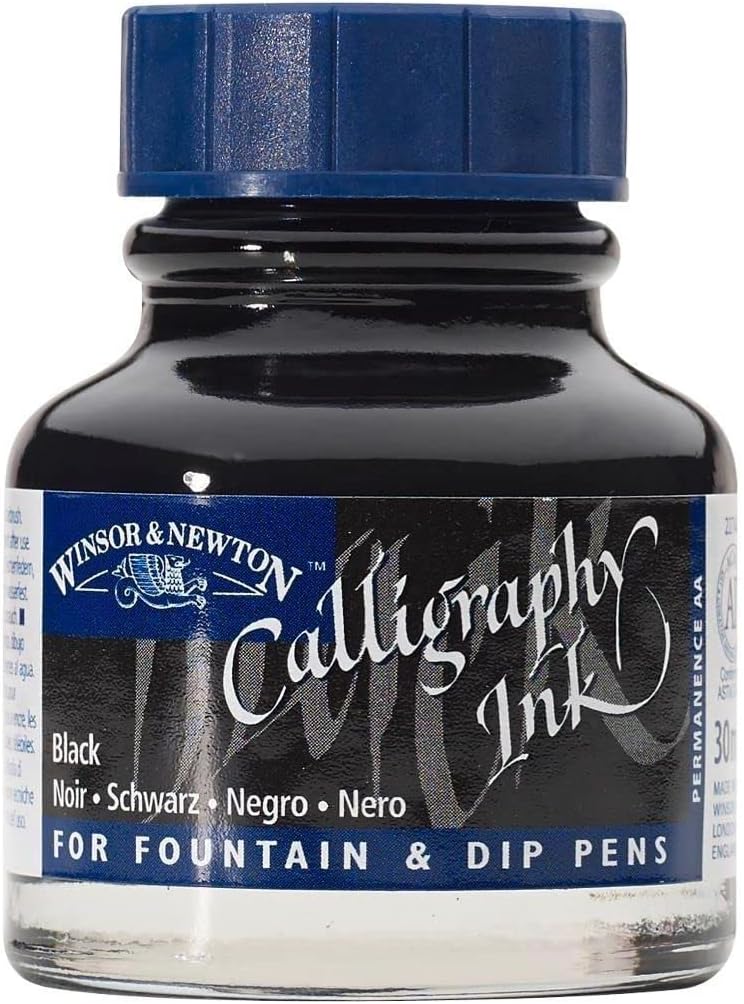
Inks play a crucial role in determining your calligraphy’s appearance and longevity. Choose from water-based inks, pigment inks, or acrylic inks according to your preference.
Water-based inks are more suitable for practice due to their affordability and easier cleanup. Pigment inks generally provide bright colors and are fade-resistant. Acrylic inks are waterproof and require more skill, as they dry quickly and are permanent once dry.
Paper Types and Quality
The right paper can significantly impact your calligraphy practice. Consider the following options:
- Smooth paper is ideal for beginners. It prevents ink bleeding or feathering.
- Bristol paper is a thicker option that can handle heavy ink applications.
- Calligraphy-specific paper is designed to provide a better ink application and prevent bleeding.
Remember to invest in high-quality paper, as it directly affects your experience and the final look of your calligraphy work.
Mastering the Calligraphy Alphabet
Learning Basic Strokes
To master calligraphy, start by learning the 9 basic strokes that form the letters in the alphabet. Practicing these strokes will help you gain control and precision with your calligraphy pen:
- Downstroke: A straight line drawn from top to bottom.
- Upstroke: A straight line drawn from bottom to top.
- Overturn: A curved line, moving from bottom left to upper right.
- Underturn: A curved line, moving from upper left to lower right.
- Ascender Loop: A tall loop moving from bottom to top, then curving back down.
- Descender Loop: A low loop moving from top to bottom, then curving back up.
- Oval: A rounded shape, either vertical or horizontal.
- Compound Curve: A combination of a curve and a straight line.
- Tilt: A diagonal stroke, either forward or backward.
Writing Lowercase Letters
With a grasp on the basic strokes, you can now form lowercase calligraphy letters. Follow these tips when writing lowercase letters:
- Begin each letter with an upstroke, then create the main shape with a downstroke.
- Hold your pen at a consistent angle (usually 45 degrees) for a uniform look.
- Pay attention to the space between letters (kerning) for proper alignment.
- Use guidelines to maintain a consistent x-height (the height of lowercase letters, excluding ascenders and descenders).
Here’s an example of lowercase calligraphy letters:
a – Start with an upstroke, then create a curved downstroke, followed by an oval.
b – Begin with an ascender loop, form a curved downstroke and finish with an underturn.
c – Start with an upstroke, then create a large oval, leaving a small gap at the bottom.
Writing Uppercase Letters
Uppercase calligraphy letters involve more elaboration and ornamentation. Remember these guidelines when writing uppercase letters:
- Ensure a consistent angle in your pen, typically between 30 and 45 degrees.
- Focus on shapes and form, like ovals, diamonds, and loops.
- Maintain balance and symmetry in the letter design.
- Add flourishes and creative details, but avoid overcrowding the letter.
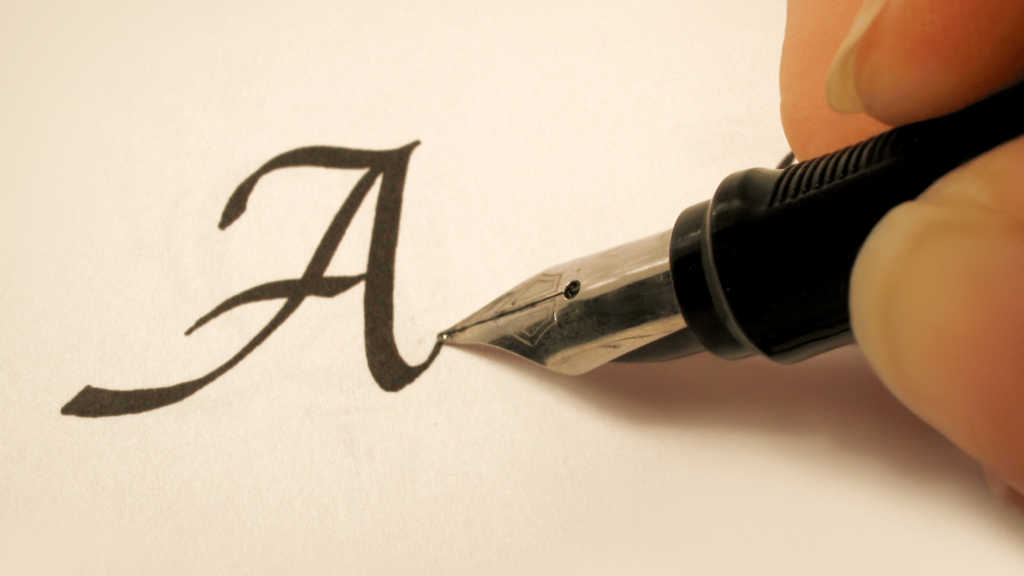
Here’s an example of uppercase calligraphy letters:
A – Create a forward tilt, followed by a compound curve, then finish with a backward tilt.
B – Start with an ascender loop, then form two small ovals (one on top of the other), and connect them with a vertical line.
C – Create a large backwards tilt, curve it around, then form an underturn.
Developing skill in calligraphy takes practice, but by focusing on mastering the alphabet, you will improve your technique and build a strong foundation for your creativity to flourish.
Guide to Calligraphy Techniques
Holding the Pen Correctly
To begin your calligraphy journey, it’s essential to hold the pen correctly. Grasp the pen using a tripod grip, similar to holding a standard pen or pencil. Place your thumb and index finger on either side of the pen, with the third finger for support.
Hold the pen at a 45-degree angle to the paper, ensuring that the pen nib is facing up. This allows for smooth ink flow and helps avoid ink splotches. Remember to maintain a relaxed grip to prevent hand fatigue and to keep your wrist steady for consistent strokes.
Achieving Consistent Letter Spacing
Consistent letter spacing is an essential element of calligraphy. Follow these steps to achieve uniform spacing in your writing:
- Choose a reference script: Study a script that appeals to you and use it as a basis to ensure consistency in your lettering.
- Practice: Fill pages with repetitive strokes and similar letter combinations to build muscle memory and gain control over your pen.
- Grid paper or guidelines: Use grid paper or draw guidelines on plain paper to help maintain equal spacing between letters and words.
During practice, focus on keeping the spaces consistent within and between words. With time, you’ll create a natural rhythm in your writing that will lead to beautifully spaced calligraphy.
Creating a Rhythm in your Writing
A pleasing rhythm in your calligraphy is achieved by maintaining consistency in stroke thickness, slant, and letter spacing. To establish a rhythm, follow these tips:
- Maintain a consistent angle: To create a unified slant, ensure that your pen is always held at the same angle relative to the paper.
- Keep the stroke thickness consistent: Upstrokes should be thin, while downstrokes should be thick. Develop a habit of applying even pressure throughout your strokes.
- Ensure letter height and width are uniform: Practice writing individual letters and letter combinations to establish consistency in their size and shape.
- Adjust your writing pace: Experiment with different writing speeds to find a comfortable pace that maintains the rhythm and quality of your calligraphy.
By mastering these techniques, you will build a strong foundation in calligraphy and enhance the overall aesthetic of your writing. Practice diligently, and soon your calligraphy skills will flourish.
Practicing Calligraphy

Creating a Practice Schedule
To improve your calligraphy skills, it’s essential to create a practice schedule. Set aside dedicated time each day or week, depending on your schedule and personal preference. Consistency is crucial to mastering the art of calligraphy, so try to create a routine that is easy to maintain. To track your progress, you can use a calendar or a digital app to log your practice sessions.
Following Calligraphy Workbooks
Calligraphy workbooks are a great resource for beginners as they provide guided practice and step-by-step instructions. Sure, starting with basic strokes by working with worksheets for small and larger brush pens will give you a solid foundation. Some popular calligraphy workbooks include:
- Copperplate worksheet for pointed pens
- Spencerian or Copperplate workbooks (for learning advanced “Fancy Calligraphy”)
These workbooks usually contain helpful practice exercises, tips, and techniques that will allow you to refine your skills.
Learning from Online Resources
In addition to using workbooks, there are numerous online resources such as video tutorials, courses, and forums where you can learn from experienced calligraphers. For example:
- YouTube tutorials: Plenty of calligraphers share their knowledge through video content, covering basic strokes to more complex lettering designs.
- Online courses: Websites like Skillshare and Udemy offer calligraphy courses that you can follow at your own pace.
- Calligraphy forums: Social media platforms, art forums, or websites like Reddit have dedicated communities where you can learn, exchange ideas, and receive feedback from other calligraphy enthusiasts.
By utilizing a combination of practice schedules, workbooks, and online resources, you’ll be well on your way to mastering the art of calligraphy.
Remember, calligraphy is a skill that takes time and patience, so don’t get discouraged during the learning process. Keep practicing and experimenting with different styles, techniques, and tools to find what works best for you.
Creating Calligraphy Art
Calligraphy is the art of writing beautifully, and as a beginner, you may feel inspired to create your own calligraphy pieces. In this section, we will discuss a few beginner and advanced projects that you can try to develop your skills and create stunning artworks.
Beginner Projects
- Alphabet practice sheets: Start by practicing the calligraphy alphabet to get a feel for the strokes, pen angles, and letterforms. You can find free printable sheets online that will guide you through each letter.
- Quote cards: Choose your favorite quotes or phrases and write them using calligraphy techniques. This project will help you practice spacing and consistency in your letterforms.
- Envelope addressing: Make your letters or invitations more personal and elegant by addressing envelopes in calligraphy. Start with your own name and address, and then move on to friends and family. You can even offer this service for events like weddings or parties.
Advanced Projects
- Calligraphy logo design: As your skills grow, try designing logos or monograms using calligraphic styles. This can be a fun way to promote your personal brand or even offer services as a calligraphy artist.
- Illuminated manuscripts: Take inspiration from the historical practice of creating intricately decorated religious texts. Combine your calligraphy skills with illustration and gold leaf to create stunning pieces of art.
- Calligraphy on unusual surfaces: Expand your skillset by trying to write on non-paper surfaces such as wood, fabric, or even glass. This can open up new possibilities for creating unique artwork and personalizing a variety of items.
Remember to practice regularly and experiment with different tools, techniques, and styles to find your unique calligraphy voice. Enjoy the process, and you’ll soon be able to create beautiful calligraphy art that will impress and inspire others.
Continuing Your Calligraphy Journey
As you further develop your calligraphy skills, there are several avenues to explore that will not only enhance your abilities but also enrich your overall experience. In this section, we will discuss essential steps to take on your journey, including joining a calligraphy society, learning advanced styles, and making a career in calligraphy.
Joining a Calligraphy Society
Becoming a member of a calligraphy society can prove to be a game-changer for your skillset. By joining a society, you can access the following benefits:
- Connect with like-minded individuals who share a passion for calligraphy
- Attend workshops, conferences, and demonstrations led by established calligraphers
- Gain access to exclusive resources, such as newsletters, tools, and discounts
- Receive constructive feedback on your work and learn innovative techniques
To find a calligraphy society near you, reach out to local art centers, or search online for relevant groups and forums.
Learning Advanced Styles
As you further develop your calligraphy skills, you should aim to master advanced styles, including:
- Traditional scripts: such as Copperplate, Spencerian, and Carolingian
- Modern calligraphy: freeform styles, flourishing, and lettering
- Unique techniques: pen manipulation, gilding, and embossing
To excel in these styles, allocate regular practice time, participate in online challenges, and enroll in workshops and classes led by professional calligraphers.
Making a Career in Calligraphy
If you are passionate about calligraphy, there are several ways to turn your hobby into a profession, such as:
- Freelance calligraphy services: offer your skills for wedding invitations, place cards, and certificates
- Teaching classes and workshops: share your expertise with beginners and enthusiasts
- Creating your own line of products: design and sell prints, notebooks, and other stationery items
- Collaborating with brands: work with companies requiring unique lettering for marketing and promotions
Remember that building a career in calligraphy takes time, dedication, and a strong network of connections within the community. Keep refining your skills, expand your portfolio, and engage with others in the industry to establish a successful and fulfilling career in calligraphy.